Menu Close

Author: Dirk Verhaert

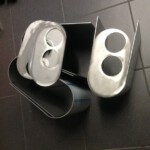
Shift shaft seal

​To keep a space smelling like a summer breeze or morning dew is child’s play, that is if you watch the TV adds. Ambi Pur and associates might do the trick and keep the cockpit of the R-Box fresh but spending an entire rally in a pine or lavender scent is a bit too much.
We’re in favor of keeping all smelly favors and pollution out of the car to begin with, minor detail is that we still have a gaping wound in the tunnel so that we’re able to stir the shift shaft sufficiently to find the right gear.
It doesn’t seem too complicated to keep it air, dust and waterproof. Yet, this silly little box has been driving us to the edge of insanity. Valium came to mind more than once.

Was it a moment of weakness, lack of space, it’s capricious shape or something else, I don’t know but after some crafts version 1 finally ended up in the bin.
The creation of version 2 took at least as much time but luckily it was usable. No spare room, definitely not the easiest to install but feasible and especially hermetically sealed.
Only the rubber stocking , previously belonging to an MKII Escort, is a bit oversized in outer diameter and is slightly rubbing against the top of the tunnel. So now we’re looking for a more fitting variant. The housing of the cable for the rear gear has also been a real challenge but we managed.

So eventually we got the job done but if we ever decide to start building a second body we need to think about all those things in the earliest stage possible.
You know what they say.. live and learn…

Gear box supports

​Due to some wrong decisions in the beginning of the project , it causes some headache to keep the gearbox in its place.

We had welded 2 cylindric shaped tubes onto the body to keep the gear box in its place. Because we hadn’t decided yet which gearbox we were going to install it was almost impossible to define the final position.

At a temporary moment of insanity we decided to place them horizontally instead of vertically which was obviously so wrong…

Furthermore we complicated things due to the fact that we wanted adjustable supports to align the height of the drive shaft.

Eventually we succeeded but this is something we will definitively change but not at this moment because welding is not acceptable due to painting at this stage.

We machined some purple Powerflex bushes on a lathe to connect the gearbox and the supports in a way that the gear box remains in suspension but it is a very rigid construction.
Even Dirk thinks its overkill

S14 engine under the spell of the smurfs …..

​As usual, when we’re not convinced 100 %, the air filter installment kept running through Dirk’s mind night after night like a bad ghost. Knowing there’s a prehistory , water still scares us immensely, so big puddles or even extreme big puddles forcing us to quit is no longer an option.
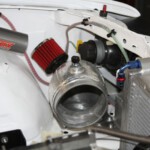
To prevent this from happening we quickly came up with a solution by adding an extra relatively small filter ( 38 mm diameter ) in the intake pipe. Under normal circumstances this is very restrictive as opposed to the big intake underneath and will barely let any air pass through. In case a huge amount of water feels like entering the system, it will take less effort to suck in air through the small filter then to suck in the whole water column.

The breathing issue needed some more thinking. I recall that during the DTM era they once used a filter stocking which was placed in the funnel leading to the airbox.
With this knowledge and supported by our curved intake pipe the idea came to mind to have a cone shaped mousse filter developed.
The cone has 2 reasons:
1 we need sufficient filter surface.
2 we need to be able to follow exactly the shape of the intake pipe.
This will create enough space between the sides of the pipe and the filter so we’ll never suffer from “shortness of breath”.

Result : the smurf hat

Let there be ….sound

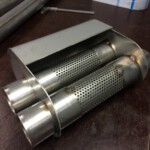
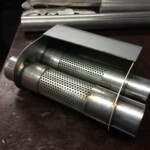
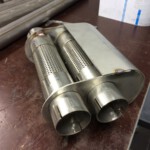
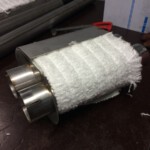
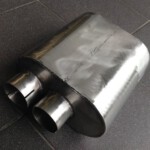
We made a custom muffler as mentioned in a previous topic. ​
It will be located on the spot of the original petrol tank. The exhaust housing just needed some cutting and bending.
The only thing left to do was to catch a sheep and put its wool in the stainless steel housing.
We don’t know how it is going to sound like but we already like the “looks”…

Pedal sensor

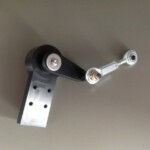
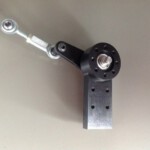
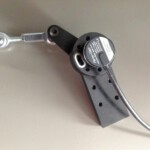
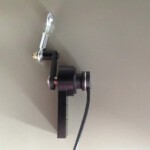
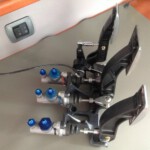
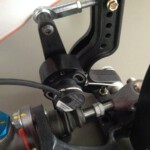
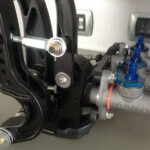
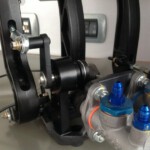
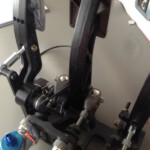
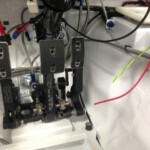
​Our mechanical guru “Nick” created a very nice model to mount the pedal sensor. Very compact and very well detailled.
The aluminium parts were anodized so they look like the r’eal Tilton OEM stuff.

It would have been easier if we bought a standard pedal sensor from any make of car but this is in most cases a pedal assembly which we strongly dislike.
We don’t like plactic pedals and it is ethetically not done to use it in combination with the Tilton pedal box.

This meant that we had to create/invent something. As usually we used the well known and very solid P+G sensors. These P+G sensors are hall based and have a very long life cycle. In an earlier topic we described what we had to do to be able to use these sensors.

Exhaust ..

​​We planned to weld the exhaust this weekend but unfortunately the parts did not arrive at the R-Box workshop in time.

The exhaust collector is going to stay for antother week at Zirotec in the UK .
Zirotec installed some new machinery and production was delayed for a week.

The rest of the parts ( steanless steel pipes , curves,..) didn’t make it either.

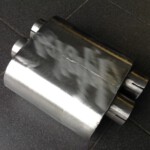
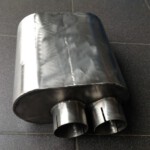
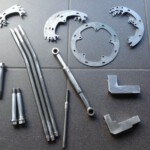
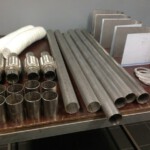
The only thing ready are the parts for the rear muffler that have been plasma cut in Belgium. It might seem a crazy idea to make a muffler ourselves while the market is flooded with aftermarket parts. We searched the web for a suitable 2 in 2 out muffler but did not find one that matches the dimensions we need.

The parts we have so far are in the picture.

Size does matter..

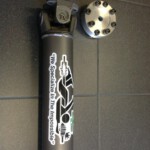
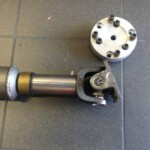
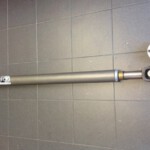
Because we do not use the standard gearbox the original drive shaft does not fit anymore. We looked at the different options we had ; adapt the original one, or use an adapted version from an M5.This also means that we should make it the right lenght and balance it again.
To avoid these problems we went (internet-)shopping in the USA.
Although the M3 was only built up until 1991 the car is still very popular in the States. Lots of spare parts (custom made for the American market) can be found. Since they always use the motto “the bigger the better” strength will not be an issue.

Racing the car will show us whether the drive shaft is really indestructible as (almost) stated in the specs.
For BMW only 1 version is availlable for all types. The length and the aluminum flanges are adapted depending on the BMW model of the car.
This mean that a M5 has the same drive shaft as a M3.

We think that the torque produced by our engine wil be a walk in the park for the drive shaft..

For those who noticed it ; the bearing to support the drive shaft has been eliminated in this setup…


Cold air intake …

​Being 30°C the only place suitable for work is the basement. We need to modify some alloy welding curves to construct a cold air intake.

Most M3 cars take cold air in the cooling grill between the lights but our radiator is a bit over sized so this area is taken.
We made a construction going from the airbox, passing the front of the wheel to the air holes in the front spoiler.
That way we avoid hot air coming in from the engine bay.
The curve we need for this setup was not a standard one so Dirk needed to sand and weld quite a bit.
The aluminum part (which has been insulated twice) starts with a diameter of 140mm and just before connecting to the blue Samco curve we made a conical reduction that has the same size as the airbox.
We only need to define a custom Twinair filter and make sure no water can enter the intake system.